For many new expats in Japan, JP Post Bank is a great way of opening a Japanese Bank Account, thanks to their policy of allowing residents who’ve been in the country less than 6 months to open an account. As a JP Post Bank account holder, you can make use of their mobile ‘BankBook’ app to manage your account online, and this can also be used to top up your MobalPay account, right from your phone!
In order to use the BankBook App, you’ll need to have a Japanese phone number. If you don’t yet have one, you can use your MobalPay account to buy a Mobal SIM here! You’ll get a real phone number from a real Japanese network carrier, and access to a range of great flexible data plans too.
Here’s how to top up your MobalPay account using the app – we’ll guide you through the process from setup, to authentication, to making a transfer.
Part 1: Get Started
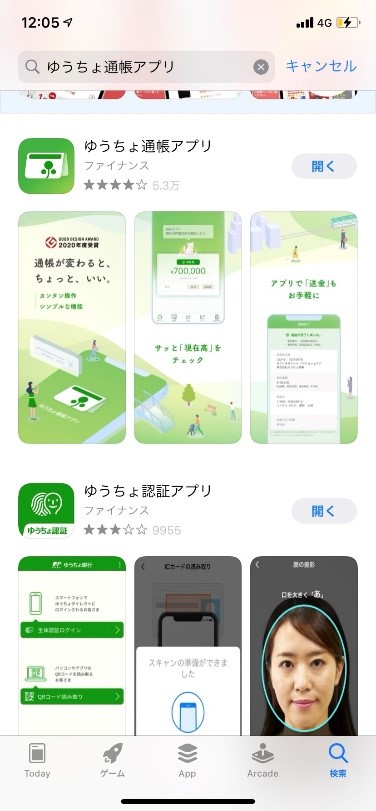
- Go to the app store and download the app for your device.
- You’ll be asked to agree to the terms and conditions and privacy policy before using the app. Scroll downs and select “同意する” to agree on both pages.
- Enter your cash card number and account number (記号番号) in the boxes provided. These are the 5 and 8-digit numbers printed next to each other on the front of your JP Post Bank cash card. In the box 姓名, enter your name in Katakana as per your cash card. Finally, enter your Date of Birth using the format displayed.
- On the next screen, you’ll be asked how you’d like to verify your identity. Choose 生体認証 to set up facial recognition.
- You’ll now be prompted to download the JP Post Bank Authenticator app.
Part 2: Set Up Facial Recognition

- Search for “ゆうちょ認証アプリ” in App Store/Google Play. Open the app once it’s downloaded to your phone.
- Skip the introductory pages using the right arrow.
- When prompted, enter your cash card’s PIN (暗証番号). Multiple incorrect entries may result in being locked out of the app. [image] Click ‘次へ’ (Next) to proceed.
- On the next screen, click ‘次へ’ (Next) to proceed.
- Next, you’ll be asked if you agree to allow your personal data to be shared with a third-party processing company. Click ‘同意する’ to agree, then ‘次へ’ (Next) to proceed.
- You’ll now be asked to choose your preferred ID (Japanese Driving License, MyNumber Card or Residence Card). If you’re new to Japan, you’ll likely only have a Residence card. To choose Residence Card, click ‘在留カード’.
- The app will now switch to English. Get your Residence card ready and click ‘Next’.
- When prompted, enter your residence card number.
- Next, hit ‘OK’ to enable the camera, and follow the instructions on the screen so that the app can perform facial verification.
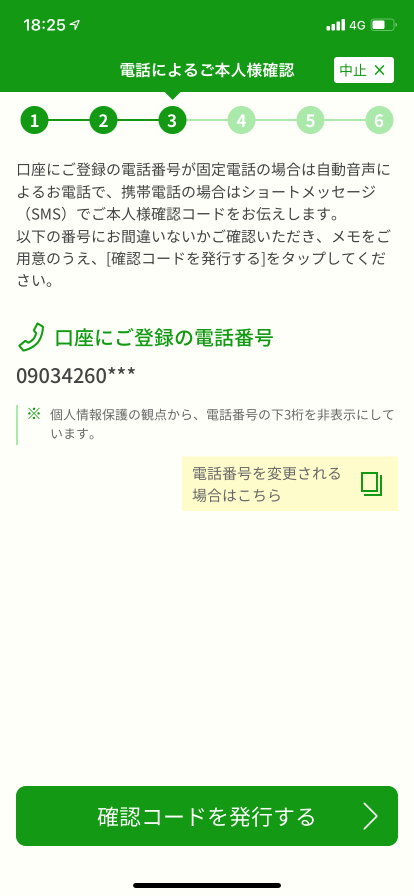
- On the next screen, select the green button ‘確認コードを発行する’ to receive a verification code. You’ll need either an SMS-enabled Japanese phone number or a landline number from which you can receive a voice message.
You’ll be asked to enter your phone number. - Enter your verification code or click ‘もう一度確認コードを確認する’ to request a new code to be issued. When complete, click next ‘次へ’
- If the Face ID function on your device is not enabled, a pop-up message will appear. Press the permission button ‘許可’ to enable.
- On the next screen, press ‘行う’ to enable authentication for transactions made via the app.
- The next screen gives you the option to set a Pass Code. This is optional and can be done at a later date if you wish. To register a Pass Code press ‘登録する’ and then ‘次へ’ (next).
- Your registration is now complete. Click ‘アプリトップ画面へ’ to return to the app home screen.
Part 3: Send Money using the JP Post Bank App
- Return to the ゆうちょ通帳 App on your device.
- Click the ‘送金’ button to send money. Your current balance is displayed above it.
- Select ‘他金融機関あてに送金’ to send money to an unregistered, non-JP Post Bank account (including your MobalPay account).
- Next, you’ll be asked to choose the bank you wish to send money to. Choose ‘三井住友銀行’ (SMBC bank).
- You’ll now be asked to select the first Japanese character of the bank branch you wish to send money to. Select ‘ア’ in Katakana and click ‘検索’. (To type in Japanese characters, you may need to set up a Japanese keyboard on your device which can be done in your device’s settings.)
- Next, select ‘アオイ支店’ (Aoi Branch) at the top of the list, then press ‘次へ’
- On the next screen, click the down arrow▼ in the ‘預金種類’ field.
- Select ‘普通’ (general deposit account).
- Enter your MobalPay account number in the ‘口座番号’ field. This is unique to you and can be found in your MobalPay MyAccount.
- Enter the amount of money you wish to send in the ‘送金額’ field and click the ‘確認’ to confirm.
- Your name and phone number should already appear on the next screen. Click the ‘次へ’ (next) button.
- Check the transaction details, and click ‘アプリを起動’.
- Finally, click ‘承認’ to authorize the transaction.
That’s it! You’ve successfully authorized a MobalPay topup using the JP Post Bank app.