Below is a step by step guide on how to request and install your eSIM on an Apple device.
Step 1: Activation Code Creation
Please complete this step 24 hours before you leave for Japan ( If you are already in Japan, please continue. ).
- Go to the ‘ Your eSIM Details’ email we sent to you, and click on the link to your eSIM Admin Portal.
- Click “Issue eSIM (activation code).”
Your eSIM should be added to the portal within 15 minutes.
Note: Server maintenance takes place every Tuesday at 22:00 and completed on Wednesday at 09:00. If you request your eSIM during this time, it will not be added into your portal until shortly after 09:00am Wednesday.
Step 2: eSIM Setup – To be completed once in Japan.
- Connect to WiFi
- Disable Airplane mode
- Disable any other SIMs/eSIMs on your device ( If possible )
Following this please install the eSIM by using the QR Code or entering the details manually;
Option 1: Installing the eSIM using the QR Code;
Note: These instructions are provided as a general guide and may differ to your device. If that’s the case please refer to your phone manufacturers user guide for exact instructions.
-
iOS 17 and above
You can either install the eSIM automatically by scanning the QR code, or you can install it manually by entering settings.
Install eSIM using QR Code
- Save the QR code as an image in the Photos app.
To save the QR code as a photo, open the image or long press it, and tap “Save Image” or “Save to Photos”. Alternatively, you can take a screenshot and trim it. - Open up “Set Up Cellular” by following these steps:
– Go to Settings
– Tap Cellular
– Tap Add eSIM in SIMs section - From there, tap Use QR Code and then Open Photos. Once you’ve selected the QR code image, it will be scanned immediately. Follow the instructions to install the eSIM
- Follow the instructions to install the eSIM
iOS 16 and below
You can either install the eSIM automatically by scanning the QR code, or you can install it manually by entering settings.
Install eSIM using QR Code
To install by scanning the QR code, you’ll need to get the code somewhere where you can scan it. You can do this in a number of ways:
- Ask someone else to take a photo of your QR, so you can scan that
- Open the QR email or this page URL on another device (e.g. computer) or forward the email to another phone
- Print the QR code
Scan the QR code with camera
- Open the iOS Camera app and scan the QR code
- Follow the instructions to install the eSIM
Scan the QR code with camera (alternative option)
- Go to Settings
- Tap Cellular
- Tap Add eSIM in SIMs section
- Select Use QR Code and then once the camera is launched, point it at the QR Code
- Follow the instructions to install the eSIM
Option 2: Installing the eSIM using the QR Code;
- Save the QR code as an image in the Photos app.
Note: These instructions are provided as a general guide and may differ to your device. If that’s the case please refer to your phone manufacturers user guide for exact instructions.
- Go to Settings > Cellular > Add eSIM > Use QR Code > Select “Enter Details Manually.”
- Fill in the required information, which you can copy directly from the eSIM Admin Portal
- If “Add Cellular Plan” appears, the installation is complete. Your device will connect to the internet without completing APN setup.
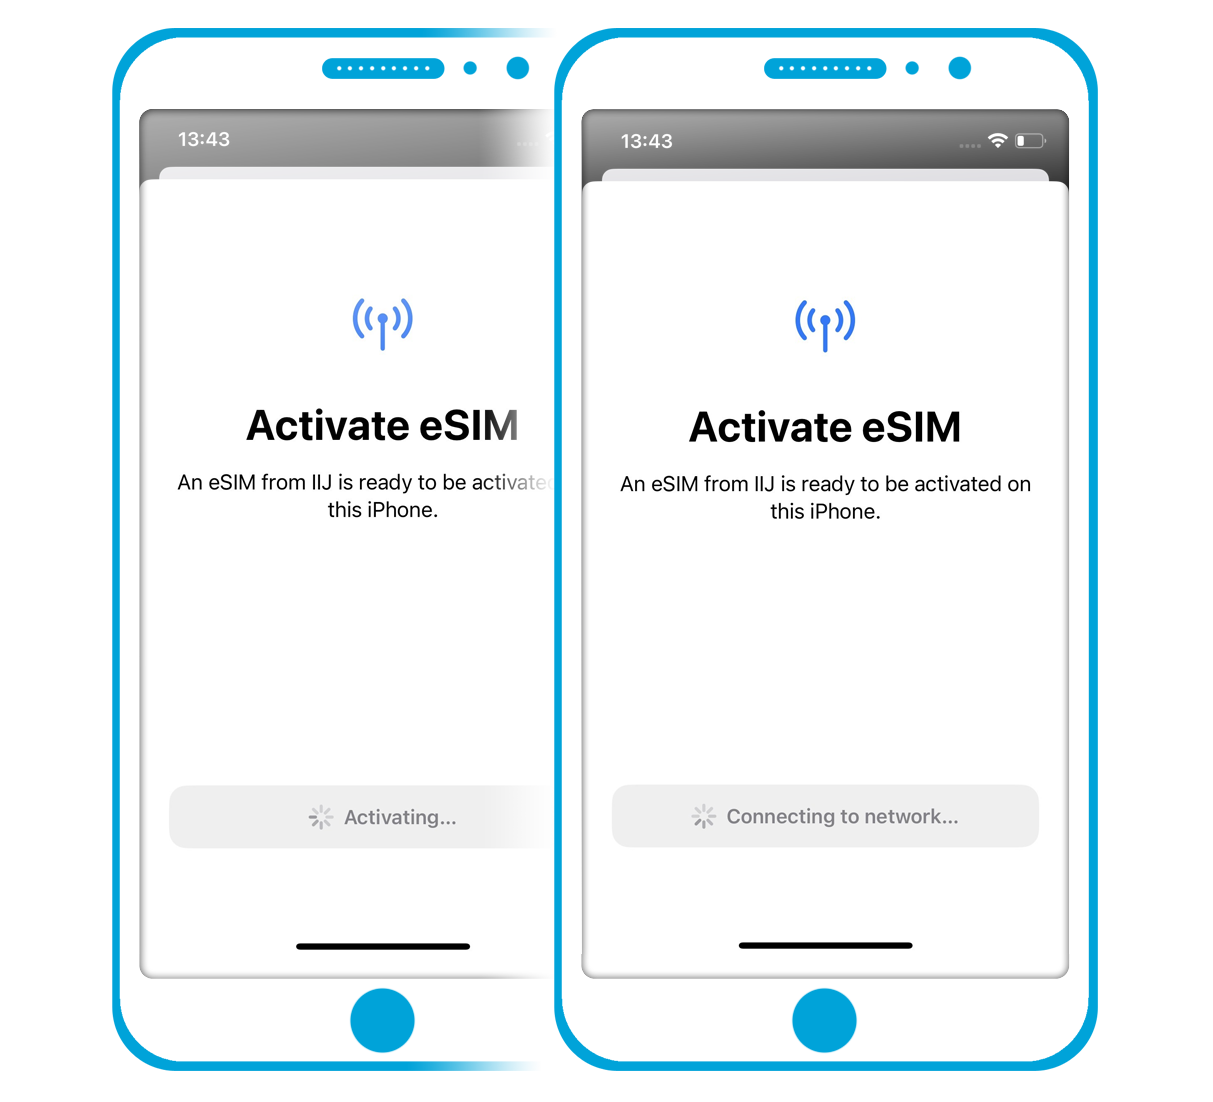
During the activation process, you may see an “Activating…” or “Connecting to network” message as shown in the images below –

It may take some time for your device to move past this section (while the activation process completes) and so please do not exit out of this screen and just wait for the installation to complete.
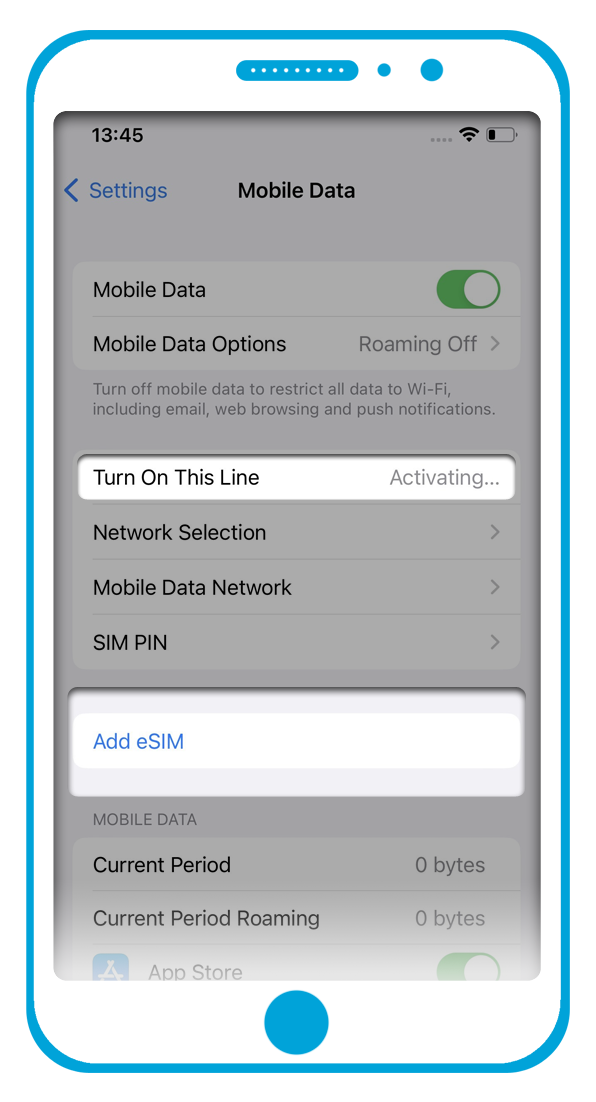
After moving past this section, you may also notice that the eSIM is not visible on your device and instead just see an “Activating” message as shown below –

Alternatively, you may also see a “Failed to connect” message once the installation of the eSIM has completed.
However, you do not need to worry as the eSIM will become fully active / this status will change once you arrive in Japan and connect to the local network.
Note: If you want to use your device for are personal hotspot/tethering, you may need need to set up the APN, which is explained on the next step.
Step 3: APN Setup
Go to Settings – Cellular and click on your Mobal eSIM
Go to Mobile Networks
Enter the following settings into the Cellular Data, LTE ( Setup ) and Personal Hotspot fields;
APN: ppsim.jp
Username: pp@sim
Password: jpn
